It’s 7 AM, and I need something for breakfast that’s not another boring toast. A batch of Cheese Danish Recipe is just what I’m craving. Flaky dough, creamy filling — it’s all coming together and smelling so good.
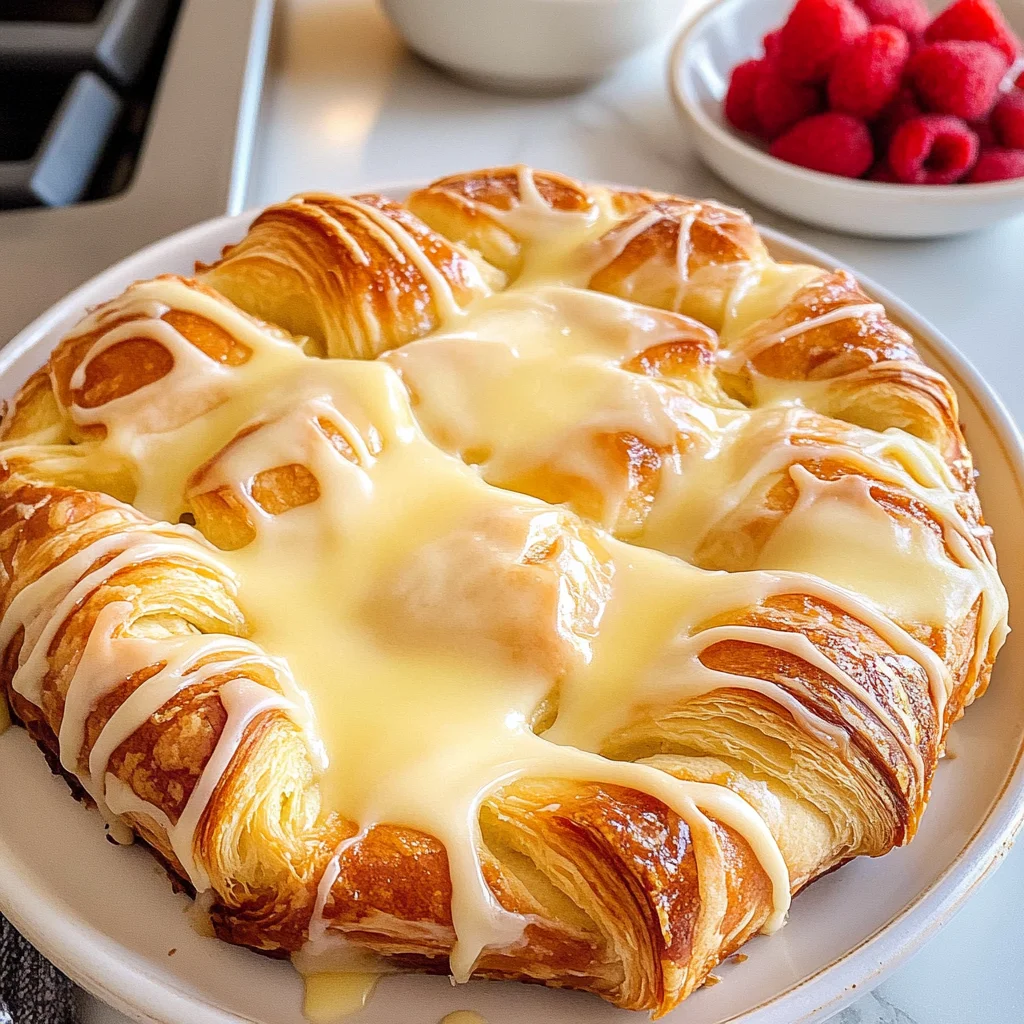
This one’s perfect for mornings when you want a little more than a granola bar but don’t have hours to spend in the kitchen (trust me, I’ve been there). Unlike store-bought versions, this recipe uses real cream cheese for that rich, satisfying flavor. Seriously, you won’t regret it! Grab your apron!
Why You’ll Love This Cheese Danish Recipe
- Super easy prep: Whip it up in no time, and you don’t need any fancy tools (just a rolling pin!).
- Creamy filling: The smooth cream cheese filling is so rich and satisfying, it’s hard to stop at one!
- Golden edges: Watch for those crisp-tender corners when it comes out of the oven—pure bliss, I tell ya.
- Customizable options: Switch up the filling with fruit or chocolate if you’re feeling adventurous (but stick with cream cheese for that classic vibe).
- Great for sharing: It’s perfect for brunch gatherings but good luck keeping it around long enough to share!
Cheese Danish Recipe Ingredients
For the Dough:
all-purpose flour (2 cups) — Use King Arthur Flour for best texture; cheap flour can make it gritty.
granulated sugar (1 tablespoon) — Don’t skimp on sugar, or your Danish won’t taste sweet enough.
salt (1 teaspoon) — A pinch of salt’s a must; skip it, and flavors fall flat.
unsalted butter (1 cup) — Use real unsalted butter, not margarine, or it’ll taste like cardboard.
cold water (1/2 cup) — Chill your water well; warm water ruins the pastry’s flakiness.
For the Filling:
cream cheese (8 ounces) — Grab Philadelphia cream cheese—don’t use low-fat; it won’t set right.
granulated sugar (1/2 cup) — Use a large egg; go smaller, and your filling might be runny.
egg (1 large) — Real vanilla extract’s essential; imitation’s just fake flavor.
vanilla extract (1 teaspoon) — Sift powdered sugar before using; otherwise, you’ll get clumps in your glaze.
For the Glaze:
powdered sugar (1 cup) — Opt for whole milk for richness; low-fat won’t give you that creamy texture.
milk (2 tablespoons)
Full measurements in the recipe card below.
How to Make Cheese Danish Recipe
1. Mix the Dough: In a large mixing bowl, combine 2 cups of all-purpose flour, 1 tablespoon of granulated sugar, and 1 teaspoon of salt. You’ll want it well-mixed for even flavor.
2. Cut in Butter: Cut in 1 cup of cold, cubed unsalted butter until the mixture resembles coarse crumbs. It should look crumbly but not too dry — keep an eye on it!
3. Form the Dough: Gradually add 1/2 cup of cold water, stirring until the dough forms a ball. Don’t rush this step; if you add too much water, your pastry won’t be flaky.
4. Chill Out: Wrap the dough in plastic wrap and refrigerate for at least 30 minutes. This is crucial for flakiness — don’t skip it!
5. Make the Filling: Now, beat 8 ounces of softened cream cheese until smooth in a mixing bowl. Add 1/2 cup of granulated sugar, 1 beaten egg, and 1 teaspoon of vanilla extract; mix until well combined.
6. Roll and Fill: Preheat your oven to 375°F (190°C). On a floured surface, roll out the chilled dough to about 1/4 inch thick. Cut it into squares and place a spoonful of filling in each center.
7. Seal & Bake: Fold the corners over the filling to create pockets and pinch to seal them tight. Place them on a lined baking sheet and bake for about 20-25 minutes until golden brown (you’ll smell that buttery goodness wafting through the kitchen).
Exact quantities in the recipe card below.
How to Store Cheese Danish Recipe
- Room Temperature: Keep them in an airtight container or cover with plastic wrap for up to 2 days. They’ll stay pretty good, but the flaky texture might start to soften a bit.
- Refrigerator: Store in a sealed container for about a week. The cream cheese filling can get a bit dense, so just know it won’t be as light and fluffy as fresh.
- Freezer: Wrap each danish tightly in plastic wrap and then place them in a freezer-safe bag. They’ll hold up for about 3 months. Just remember that the dough might lose some of its flakiness when thawed.
- Reheating: Preheat your oven to 350°F (175°C) and bake for about 10 minutes until warmed through and slightly crispy on the outside. You’ll want to see that golden hue come back!
What to Serve with Cheese Danish Recipe?
These danishes are delightfully rich and creamy, so something light or tangy on the side helps balance the flavors.
- Fresh Berries: The acidity of strawberries or raspberries cuts through the creaminess nicely. Just toss a handful in a bowl.
- Greek Yogurt: A dollop adds a cool, creamy contrast. I’d recommend using plain for that tangy bite.
- Citrus Salad: Try combining orange and grapefruit segments for a bright, juicy balance. It’ll take you just 10 minutes to prep.
- Iced Coffee: The cold temperature and slight bitterness make each bite feel lighter. Brew it strong for best results!
- Lemonade: Tartness balances the sweetness perfectly. A chilled glass right next to your danish is heavenly.
- Honeyed Ricotta: Mix ricotta with honey for a sweet but slightly grainy texture. Spread it on the danish for a twist.
- Vanilla Ice Cream: Serve a scoop alongside while it’s still warm. The melty-gooey contrast is totally worth it!
- Mint Tea: A refreshing sip after each bite keeps everything feeling light and airy, plus it’s super easy to brew fresh!
Cheese Danish Recipe Variations
- Lemon Zest: Add 1 tablespoon of lemon zest to the filling for a refreshing citrus kick.
- Almond Extract: Swap out vanilla extract for 1 teaspoon almond extract in the filling for a nutty twist.
- Berry Filling: Mix in 1/2 cup of your favorite berries with the cream cheese for a fruity surprise.
- Chocolate Drizzle: After glazing, drizzle melted chocolate over the danishes for an indulgent touch. (So good!)
- Nut Topping: Sprinkle chopped nuts on top before baking for added crunch and flavor.
- Cinnamon Sugar Dusting: Combine 1 tablespoon of cinnamon with sugar and sprinkle over the danishes before baking for extra sweetness.
- Savory Spinach & Feta: Replace the sweet filling with sautéed spinach and crumbled feta cheese for a savory option.
Make Ahead Options for Cheese Danish Recipe
I love prepping the dough and filling ahead of time for this Cheese Danish Recipe. You can make the dough up to 2 days in advance—just wrap it tightly in plastic wrap and store it in the fridge. The filling keeps well too, stored in an airtight container, for about 3 days. When you’re ready to serve, roll out the chilled dough, add the filling, and bake them fresh. Just a heads up: while the baked danishes are best enjoyed warm, they can get a bit soft if left out too long. So, bake right before serving! Trust me on this one.
Cheese Danish Recipe Recipe FAQs
Can I make this Cheese Danish Recipe ahead of time?
You can totally prep this dish ahead! Make the dough and filling, then store them separately in the fridge. Just keep the dough wrapped tight so it doesn’t dry out. When you’re ready to bake, roll out the dough and fill it up. Just know that chilling time is key for flakiness, so don’t skip that step!
Why did my Cheese Danish Recipe turn out soggy?
Soggy danishes usually mean too much water in your dough or not enough baking time. You need that cold water to be just right; too much ruins flakiness! Also, keep an eye on them while they bake — you want a golden-brown color (and that buttery smell filling the kitchen) to know they’re done.
What can I substitute for cream cheese in this recipe?
If you need a substitute for cream cheese, mascarpone can work, but it’s softer and won’t set quite like cream cheese. You could also try ricotta mixed with a bit of sour cream to get closer to that texture. Just remember: don’t go low-fat; it messes with the consistency.
Can I freeze these danishes after baking?
Absolutely! Once they cool down, wrap each one tightly in plastic wrap and pop them in a freezer bag. They’ll keep well for about a month. When you’re ready to eat one, just thaw it in the fridge overnight and warm it up in the oven — trust me, it’s worth it!
Final Thoughts on Cheese Danish Recipe
The real magic of this Cheese Danish Recipe lies in how the flaky, buttery dough complements that creamy, sweet filling. It’s a fantastic way to impress yourself (and maybe a few guests) without spending hours in the kitchen. If you’ve been putting this off, tonight’s the night. You’ll love how satisfying it is to pull those golden-edged pastries from the oven and drizzle them with glaze. Let me know how yours turned out in the comments!
Cheese Danish Recipe
Ingredients
Method
- In a large mixing bowl, combine the flour, sugar, and salt.
- Cut in the cold butter until the mixture resembles coarse crumbs.
- Gradually add the cold water, stirring until the dough forms a ball.
- Wrap the dough in plastic wrap and refrigerate for at least 30 minutes.
- In a mixing bowl, beat the softened cream cheese until smooth.
- Add the sugar, beaten egg, and vanilla extract, mixing until well combined.
- Preheat your oven to 375°F (190°C).
- On a floured surface, roll out the chilled dough to about 1/4 inch thick.
- Cut the dough into squares, and place a spoonful of filling in the center of each square.
- Fold the corners of the dough over the filling to create a pocket, pinching to seal.
- Place the assembled danishes on a baking sheet lined with parchment paper.
- Bake in the preheated oven for 20-25 minutes, or until golden brown.
- Remove from the oven and let cool slightly on a wire rack.
- In a small bowl, whisk together the powdered sugar and milk until smooth.
- Drizzle the glaze over the warm danishes before serving.