Oven’s preheating, and I can already smell the sweet vanilla wafting through the kitchen. Twinkie Cake is happening, and it’s gonna be a hit.
This one’s for weekends when you’ve got a crowd coming over and need a dessert that’ll wow them without turning your kitchen into chaos. Unlike store-bought versions, this cake uses real heavy cream for the filling, giving it that rich, homemade taste (trust me on this). You won’t regret making this instead of running to the bakery. It’s time to bake!
Why You’ll Love This Twinkie Cake
- Super Easy: Seriously, if you can mix batter and whip cream, you can make this. No fancy skills needed!
- Sweet Vanilla Flavor: The vanilla shines through with every bite, making it taste just like a classic treat from childhood.
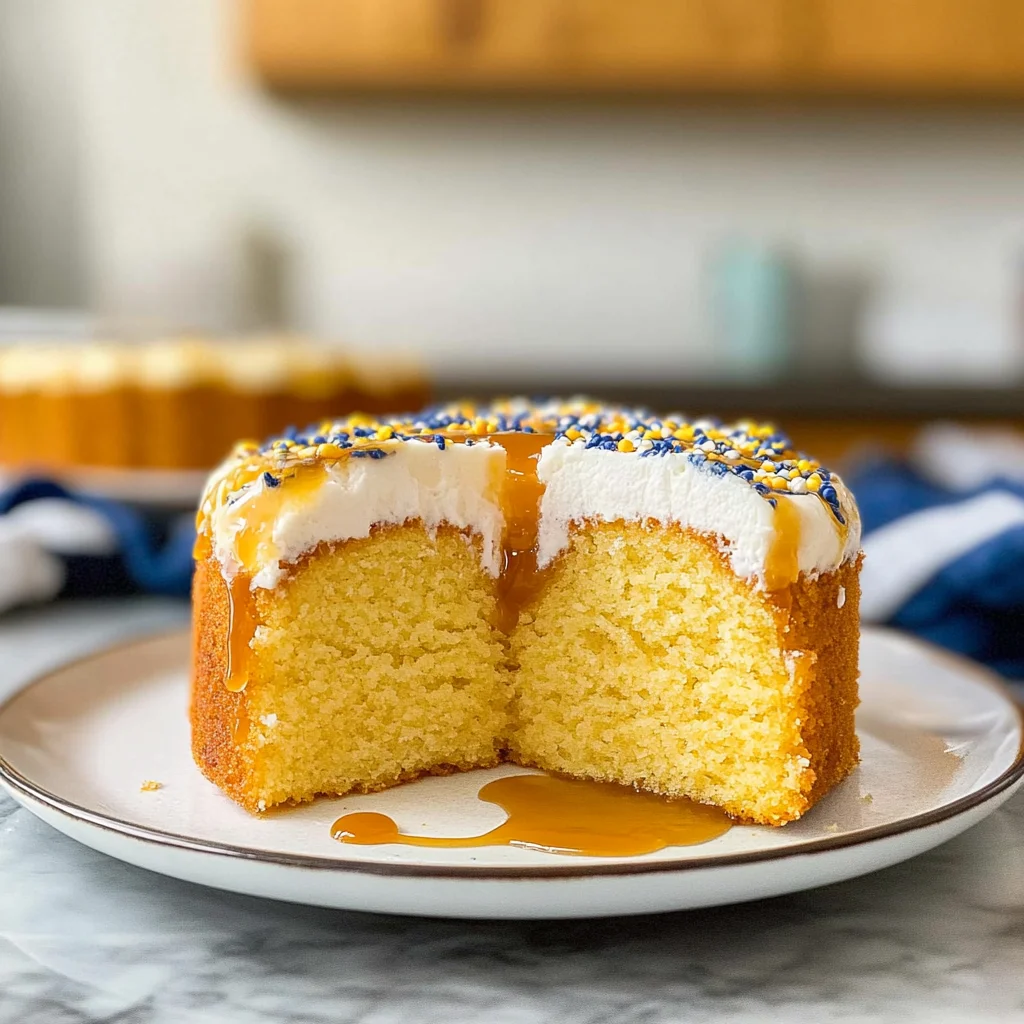
- Fluffy & Moist: The cake is so fluffy and moist that it practically melts in your mouth. You won’t want to stop!
- Customizable Layers: Feel free to switch up the filling or frosting; it’s super versatile depending on what you’re craving.
- Surprising Treat: It keeps well in the fridge for a few days — just be ready for some serious fridge raiding (especially after day 1).
Twinkie Cake Ingredients
For the Cake:
all-purpose flour (2 cups) — Use a kitchen scale for all-purpose flour, or you’ll end up with a dense cake.
granulated sugar (1 cup) — Stick to granulated sugar, don’t even think about using brown, or the cake won’t rise right.
baking powder (1 tablespoon) — Use double-acting baking powder like Rumford, or your cake won’t puff up properly.
salt (1/2 teaspoon) — Don’t skip the salt; it balances sweetness, or your cake’ll taste flat.
whole milk (1 cup) — Go for whole milk, not skim, or your cake’ll turn out dry and sad.
unsalted butter (1/2 cup) — Use unsalted butter, or you’ll lose control of the saltiness in your cake.
eggs (3 large) — Fresh eggs are key—substituting with anything else will ruin the texture.
vanilla extract (1 teaspoon) — Use pure vanilla extract; don’t even think about the imitation stuff, it’s just wrong!
For the Cream Filling:
heavy cream (1 cup) — Get heavy cream like Land O’Lakes for the fluffiest frosting; don’t skimp on fat!
powdered sugar (1/4 cup) — Always use powdered sugar for frosting—regular sugar won’t give you that smooth finish.
vanilla extract (1 teaspoon) — Use butter, not margarine; your cake’s flavor depends on it for sure!
For the Frosting:
butter (1 cup)
powdered sugar (4 cups)
heavy cream (1/4 cup)
vanilla extract (1 teaspoon)
Full measurements in the recipe card below.
How to Make Twinkie Cake
1. Preheat the Oven: Preheat your oven to 350°F (175°C) and grease two 9-inch round cake pans really well to avoid any sticking.
2. Mix Dry Ingredients: In a large mixing bowl, combine flour, sugar, baking powder, and salt. Whisk together until well blended — you want it to look nice and uniform.
3. Combine Wet Ingredients: Now, in another bowl, whisk together milk, melted butter, eggs, and vanilla extract until it’s smooth and creamy. That sweet smell of vanilla should hit you right away!
4. Combine Mixtures: Pour those wet ingredients into the dry ones, mixing until just combined — don’t overdo it! You want a few lumps left for a light texture.
5. Bake the Cakes: Divide the batter evenly between the prepared pans and bake for 25-30 minutes. You’ll know it’s done when a toothpick comes out clean — but don’t walk away; it can turn from fluffy to dry if you leave it too long.
6. Cool the Cakes: Let the cakes cool in the pans for about 10 minutes before transferring them to wire racks to cool completely. This part is crucial — if they’re still warm, your cream filling will melt into goo.
7. Make the Filling: While those cakes are cooling, whip up your cream filling by beating chilled heavy cream until soft peaks form, then gradually add powdered sugar and continue whipping until stiff peaks form.
Exact quantities in the recipe card below.
How to Store Twinkie Cake
- Room Temperature: Keep it in an airtight container for up to 2 days. (But honestly, it probably won’t last that long if it’s good!)
- Refrigerator: Store in the fridge in a covered cake stand or wrapped tightly with plastic wrap for up to a week. The cream filling can get a bit soft and lose some of its fluffiness.
- Freezer: Wrap slices individually in plastic wrap, then store them in a freezer-safe bag for up to 3 months. Just know that the texture might change a little after thawing (but still tasty!).
- Reheating: If you want to warm it up, pop a slice in the microwave for about 10-15 seconds. It should feel just warm enough to melt the cream slightly but not hot — no one wants a molten mess!
What to Serve with Twinkie Cake?
This cake is sweet and rich, so pairing it with something light or tangy keeps things balanced and enjoyable.
- Fresh Berries: The tartness cuts the sweetness and adds a pop of color contrast. Try strawberries, blueberries, or raspberries.
- Vanilla Ice Cream: A scoop adds creamy texture that complements the cake’s fluffy layers (plus, it’s easy to serve!).
- Coffee: The warm bitterness provides a nice contrast to the sweet flavors. Brew a pot while you whip the cream.
- Lemon Sorbet: Its icy chill against the cake’s warmth refreshes your palate after each bite — perfect for hot days!
- Mint Tea: I’d go with a fresh mint infusion; it offers soothing aromas and balances out the sweetness nicely.
- Citrus Salad: A mix of oranges and grapefruit brings acidity that brightens up this dish (just prep it in under ten minutes).
- Chocolate Sauce: Drizzle some over each slice for a melty-gooey touch; just warm it slightly in the microwave before serving.
You’ll find these pairings make enjoying dessert feel more well-rounded and fun!
Twinkie Cake Variations
Here’s how to play with this recipe and make it your own!
- Chocolate Twinkie Cake: Add 1/2 cup cocoa powder to the dry ingredients for a rich, chocolatey twist.
- Vanilla Bean Upgrade: Substitute 1 teaspoon vanilla extract with the seeds from 1 vanilla bean for an elevated flavor.
- Lemon Zest Surprise: Mix in 1 tablespoon lemon zest with the wet ingredients for a bright, citrusy kick.
- Almond Cream Filling: Replace 1/4 cup powdered sugar with almond extract for a nutty cream filling.
- Berry Layered Delight: Fold in 1 cup of mixed berries into the cream filling before layering for a fruity surprise.
- Nutty Crunch Topping: Sprinkle chopped nuts on top of the frosting before refrigerating for added texture and crunch.
- Coffee Infusion: Add 2 tablespoons of instant coffee granules to the wet mix for a subtle coffee flavor boost.
Make Ahead Options for Twinkie Cake
I like to prep the Twinkie Cake a day ahead, so it’s ready when I need it. You can bake the cake layers in advance and store them in an airtight container at room temperature or wrap them tightly in plastic wrap if you want to keep them fresh for up to two days. The cream filling holds well too, so whip that up and keep it chilled in the fridge. Just be sure to frost the cake right before serving because the frosting can get a bit soft if it sits too long. (Trust me on this; I’ve learned the hard way.) Keep it simple and enjoy!
Twinkie Cake Recipe FAQs
Can I make Twinkie Cake ahead of time?
Totally! You can bake the cakes a day or two in advance. Just let them cool completely, wrap them tightly in plastic wrap, and store them in the fridge. When you’re ready to assemble, whip up that cream filling and frosting fresh for the best texture. (Trust me, nobody wants a soggy cake.) Just remember to refrigerate once it’s frosted to keep everything nice and firm.
Why did my Twinkie Cake come out dense?
If your cake turned out dense, it might be because you packed the flour too tightly or didn’t use enough baking powder. Always measure flour using a kitchen scale for accuracy; that’s key! Also, don’t skip letting the batter sit too long before baking — that puffing action needs to happen quickly. A fluffy cake should spring back slightly when touched. If it feels like a brick, you know something went wrong!
What can I substitute for heavy cream in this recipe?
Heavy cream is really what gives that creamy filling its magic, so I’d avoid substitutes if you can. But if you’re desperate, you could try full-fat coconut milk for a dairy-free option — just know it’ll change the flavor a bit. And remember: whatever you use must be chilled beforehand for better whipping results. If it’s warm, you’ll end up with sad goo instead of fluffy peaks.
Can I use margarine instead of butter in this dish?
I wouldn’t recommend using margarine at all here — stick with unsalted butter for the best flavor and texture. Margarine can change how your cake rises and tastes; plus, butter has that rich creaminess you want. It’s super important to whip your butter until it’s creamy before adding anything else into your frosting, or you won’t get that smooth finish you’re after!
Final Thoughts on Twinkie Cake
Honestly, the best part about making Twinkie Cake is how it captures that nostalgic flavor we all know and love while being surprisingly simple to whip up. Once you nail the technique of whipping the heavy cream and balancing the sweetness with just the right amount of salt, you’ll find yourself reaching for this recipe again and again. If you’ve been putting this off, tonight’s the night. Let me know how yours turned out in the comments!
Twinkie Cake
Ingredients
Method
- Preheat your oven to 350°F (175°C) and grease two 9-inch round cake pans.
- In a large mixing bowl, combine flour, sugar, baking powder, and salt. Mix well.
- In another bowl, whisk together milk, melted butter, eggs, and vanilla extract.
- Pour the wet ingredients into the dry ingredients and mix until just combined.
- Divide the batter evenly between the prepared cake pans.
- Bake in the preheated oven for 25-30 minutes, or until a toothpick inserted in the center comes out clean.
- Let the cakes cool in the pans for 10 minutes, then transfer to wire racks to cool completely.
- In a mixing bowl, whip the chilled heavy cream until soft peaks form.
- Gradually add the powdered sugar and vanilla extract, and continue to whip until stiff peaks form.
- Once the cakes are completely cooled, slice each cake in half horizontally to create four layers.
- Spread a layer of the cream filling between the first two layers of cake.
- Stack the layers back together, then spread a thin layer of frosting over the entire cake.
- In a mixing bowl, beat softened butter until creamy, then gradually add powdered sugar, heavy cream, and vanilla extract, mixing until smooth.
- Frost the top and sides of the cake with the prepared frosting.
- Decorate as desired and refrigerate for at least 30 minutes before serving.