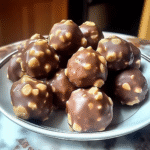
Indulging in Butterfinger Balls is like biting into a creamy, crunchy dream that dances on your taste buds. Picture this: smooth peanut butter melded with crushed Butterfinger candy bars, all rolled into delightful bite-sized morsels that call out to you like sirens of sweetness. The aroma wafts through the kitchen, teasing your senses and promising a treat that’s as fun to make as it is to eat.
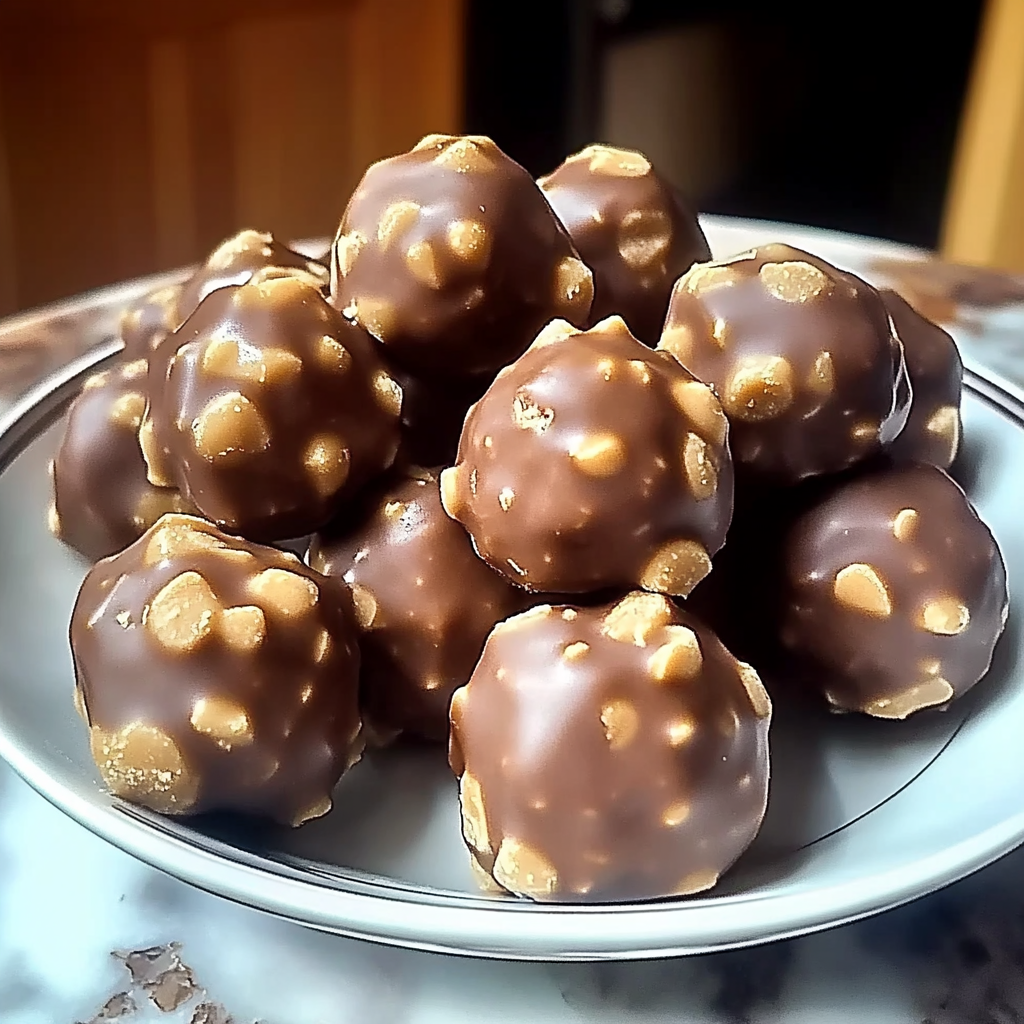
I remember the first time I made Butterfinger Balls. It was during a family gathering where my cousin’s competitive spirit turned snack-making into an Olympic event. We laughed, we tasted, and we ended up with more Butterfinger Balls than we could handle—every last one devoured before the day was over. Perfect for parties, movie nights, or just when you need a mid-afternoon pick-me-up, these little delights bring joy to any occasion. Get ready for a flavor explosion that will leave your friends begging for the recipe!
Why You'll Love This Recipe
- These Butterfinger Balls are incredibly easy to whip up, making them perfect for both novice and experienced cooks.
- The unique combination of flavors offers a sweet and salty experience that’s hard to resist.
- Their eye-catching appearance makes them a delightful addition to any dessert table.
- Versatile enough for any occasion, they’re great for parties, holidays, or just because!
Ingredients for Butterfinger Balls
Here’s what you’ll need to make this delicious dish:
-
Butterfinger Candy Bars: You’ll need about 4-5 bars; crush them finely to achieve that signature Butterfinger crunch.
-
Peanut Butter: Creamy or crunchy works well; this acts as the glue holding your delicious balls together.
-
Powdered Sugar: This adds sweetness and helps bind everything without being overly sticky.
-
Chocolate Chips: Choose semi-sweet or milk chocolate; these will be melted for coating your balls.
-
Crushed Peanuts (optional): For extra crunch and garnish; sprinkle on top after coating in chocolate for added flair.
The full ingredients list, including measurements, is provided in the recipe card directly below.
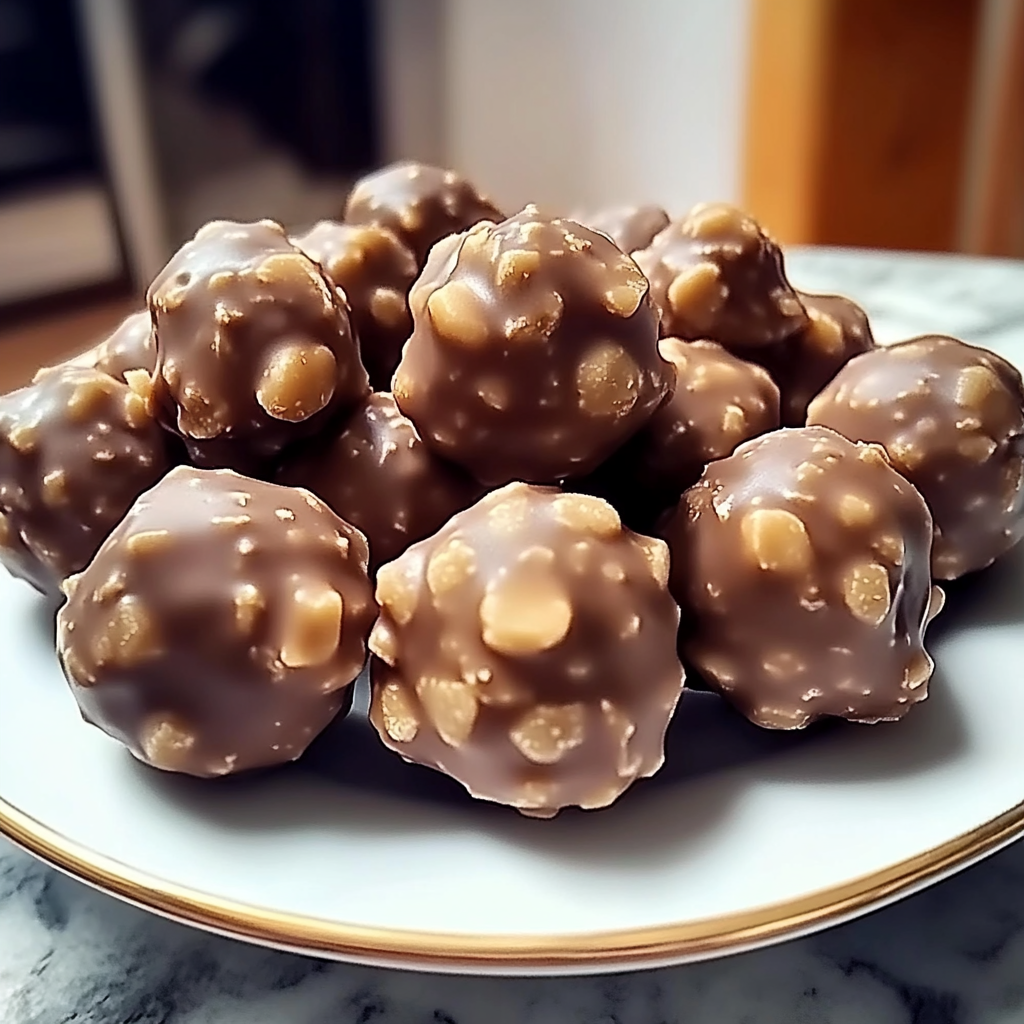
How to Make Butterfinger Balls
Follow these simple steps to prepare this delicious dish:
Step 1: Prepare Your Workspace
Start by clearing off a large countertop space. You’ll want room to roll those tasty little balls without sending them flying off the table.
Step 2: Crush the Candy Bars
In a large bowl, combine your crushed Butterfinger candy bars and peanut butter. Mix until it resembles a deliciously sticky dough that you can’t resist tasting (just a tiny nibble!).
Step 3: Add Sweetness
Gradually mix in powdered sugar until well combined. You should end up with a thick mixture that’s easy enough to mold but still gooey enough to stick together.
Step 4: Roll Into Balls
Using your hands (wash those hands first!), roll the mixture into bite-sized balls—about one inch in diameter should do it. Place them on a parchment-lined baking sheet.
Step 5: Chill Out
Pop your baking sheet into the fridge for about 30 minutes. This cooling period helps firm up your balls so they hold their shape while you coat them in chocolate.
Step 6: Melt and Coat
Melt the chocolate chips in a microwave-safe bowl in short bursts until smooth. Dip each chilled ball into the melted chocolate using two forks, then place back on the parchment paper and sprinkle with crushed peanuts if desired.
Transfer to plates and serve these delightful treats at room temperature or refrigerate until you’re ready to indulge! Your friends will love these sweet bites of nostalgia wrapped in chocolate bliss!
You Must Know
- These delightful Butterfinger Balls are not just a treat; they’re a nostalgic journey back to childhood.
- Easy to whip up, they require minimal ingredients and bring a smile to anyone’s face.
- Perfect for parties or just a sweet indulgence at home.
Perfecting the Cooking Process
Start by crushing the Butterfinger candy bars into fine crumbs. Combine them with cream cheese until smooth, then form balls and chill before rolling in chocolate for that perfect coating. This sequence ensures your Butterfinger Balls are deliciously decadent every time.
Add Your Touch
Feel free to customize your Butterfinger Balls by using different types of chocolate. Consider dark chocolate for a richer flavor or white chocolate for a sweeter twist. You can also sprinkle crushed nuts or drizzled caramel on top for an extra layer of yum.
Storing & Reheating
Store your Butterfinger Balls in an airtight container in the refrigerator for up to a week. For best results, enjoy them chilled straight from the fridge; no reheating needed here—just pure bliss in every bite!
Chef's Helpful Tips
- To get the best texture, ensure your cream cheese is at room temperature before mixing—it makes blending effortless.
- Use high-quality chocolate for coating; it truly enhances the flavor.
- Lastly, don’t skip chilling the balls; it helps them hold their shape while coating!
Sometimes I make these Butterfinger Balls for potluck gatherings, and they disappear faster than I can say “chocolatey goodness.” My friends rave about them, claiming they’re better than actual Butterfingers!
FAQs :
What are Butterfinger Balls?
Butterfinger Balls are delicious no-bake treats made from crushed Butterfinger candy bars, peanut butter, and powdered sugar. These bite-sized snacks are perfect for parties or as a sweet indulgence at home. The combination of creamy peanut butter and chocolatey goodness creates a delightful flavor that’s hard to resist. You can easily make them at home with just a few ingredients and minimal effort.
How do I store Butterfinger Balls?
To keep your Butterfinger Balls fresh, store them in an airtight container. Place parchment paper between layers to prevent sticking. They can be kept in the refrigerator for up to two weeks or in the freezer for longer storage. If frozen, allow them to thaw in the refrigerator before serving for the best texture and flavor.
Can I customize my Butterfinger Balls recipe?
Absolutely! You can customize your Butterfinger Balls by adding different toppings or mixing in other ingredients. For example, you can roll them in crushed nuts or drizzle melted chocolate on top. Feel free to experiment with flavors like adding a hint of vanilla or using different types of candy bars for unique variations.
Are Butterfinger Balls suitable for special diets?
While traditional Butterfinger Balls contain gluten and refined sugar, you can modify the recipe to fit specific dietary needs. Use gluten-free cookies and natural sweeteners if you’re aiming for healthier options. Always check ingredient labels to ensure they meet your dietary requirements, especially if you have allergies.
Conclusion for Butterfinger Balls :
In summary, Butterfinger Balls are a simple yet delightful treat that combines the flavors of peanut butter and chocolate into bite-sized goodness. They require minimal ingredients and effort while offering endless customization options. Whether served at parties or enjoyed as an everyday snack, these treats are sure to please any crowd. Store them correctly to maintain their freshness and enjoy the sweet taste of homemade treats whenever you desire!
Butterfinger Balls
Butterfinger Balls are a delightful no-bake treat that combines the creamy richness of peanut butter with the crunchy sweetness of crushed Butterfinger candy bars. These bite-sized snacks are perfect for parties, movie nights, or a satisfying mid-afternoon pick-me-up. With just a handful of ingredients and minimal effort, you can whip up these irresistible morsels that are sure to impress your friends and family.
- Prep Time: 15 minutes
- Cook Time: 0 minutes
- Total Time: 15 minutes
- Yield: Approximately 24 servings 1x
- Category: Dessert
- Method: No-bake
- Cuisine: American
Ingredients
- 4–5 Butterfinger candy bars (crushed)
- 1 cup creamy peanut butter
- 2 cups powdered sugar
- 1 cup semi-sweet chocolate chips
- ½ cup crushed peanuts (optional for garnish)
Instructions
- Clear a workspace and crush the Butterfinger bars into fine crumbs.
- In a large bowl, mix crushed Butterfinger with peanut butter until well combined.
- Gradually add powdered sugar, mixing until you have a thick, moldable dough.
- Roll mixture into one-inch balls and place them on a parchment-lined baking sheet.
- Chill in the refrigerator for 30 minutes to firm up.
- Melt chocolate chips in short bursts in the microwave until smooth. Dip each chilled ball into melted chocolate and return to the baking sheet. Sprinkle with crushed peanuts if desired.
- Let set at room temperature or refrigerate before serving.
Nutrition
- Serving Size: 1 ball (25g)
- Calories: 100
- Sugar: 8g
- Sodium: 50mg
- Fat: 5g
- Saturated Fat: 2g
- Unsaturated Fat: 3g
- Trans Fat: 0g
- Carbohydrates: 12g
- Fiber: 0g
- Protein: 2g
- Cholesterol: 0mg
Keywords: - For a richer flavor, try using dark chocolate instead of semi-sweet. - Add a drizzle of caramel on top for extra sweetness. - Store in an airtight container in the refrigerator for up to one week.

